
Stretching Advice
Welcome to the Stretch Page!
Many of my clients need help and advice on how to stretch. So what better way to help them and you by showing some stretches to help improve your flexibility and also prevent injuries!
As you will see there are quite a few stretches on the next few pages and to make things easier for you I haven’t quoted technical names, just basic terminology for you to understand.
On each picture you will see a YELLOW LINE and this is to indicate where you should feel the stretch. However this is a guideline as everyone’s body is very different and from my experience some clients, from either over tightness or over flexibility find it hard to feel the stretch within that area. So please be aware of this.
Some of the stretches are repeated either sitting, standing or lying down. This is for a few reasons:
- Some are easier or harder than others, so it is good to find something at your level.
- Also for on the go, you don’t have to be lying down to stretch!
Before you start, here are some useful tips for stretching:
- Make sure you are warmed up before you start, so never on a cold muscle. This doesn’t mean that you need to go out for a jog! Just by doing gentle movements to limber up the joints will help get them warmer. The warmer the muscles the more stretch you will get, it won’t feel restricted.
- How long to hold the stretch for really depends on you. If you find the stretch difficult to do, then start off at a time suitable for you. Generally aim for 30 secs, gradually build up to 60 secs and then even 90 secs. It is better to start with a time you can achieve than thinking you can’t do the stretch which then may knock your confidence and therefore you won’t try again. Remember everyone is different.
- If the muscle starts shaking, you have over stretched beyond your range, so just take the stretch back a little bit until it feels more comfortable and stops shaking.
- Use a timer. If you think you are stretching for 60 secs without a timer and counting yourself….it is most probably not 60 secsbut more like 20! A timer will help keep you stretching for the right amount of time and therefore better results!
Happy Stretching!
Sara
Stretches - 1
Don’t forget the yellow mark on each stretch is where you want to feel it.
Click on any of the photos for a larger view.
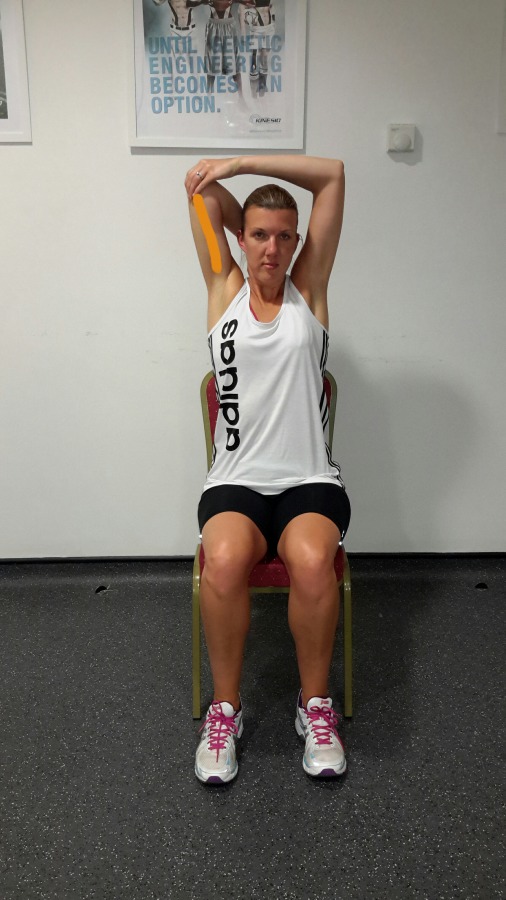
Back Of Neck Stretch
This stretch can be quite difficult, so I enclose 3 stages to help get you there.
-

- 1st Stage Back of Neck Stretch

-

- 2nd Stage Back of Neck Stretch

-

- 3rd Stage Back of Neck Stretch

Standing Chest Stretch
There are two pictures here which show the front and back of this stretch so you know exactly how to get the positioning.
-

- Part 1 Front of Standing Chest Stretch

-

- Part 2 Back of Standing Chest Stretch

In this picture below Claire is holding the water bottle in her hand to give more resistance to the stretch. To make it easier just do the stretch without the bottle.
-

- Lying Chest Stretch

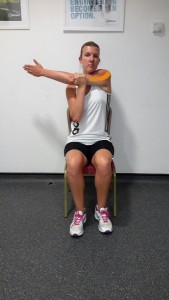
Forearm and Shoulder Blade Stretch
There are two pictures here which show the front and back of this stretch so you know exactly how to get the positioning.
-

- Part 1 of Forearm Shoulder Blade Stretch

-

- Part 2 of Forearm Shoulder Blade Stretch

Side of Neck Stretch
-

- Side of Neck Stretch
-

- Wrist and Under Forearm Stretch

-

- Shoulder and Shoulder Blade Stretch

-

- Seated Back of Arm Stretch
-

- Seated Wrist and Forearm

-
- Seated Shoulder Stretch

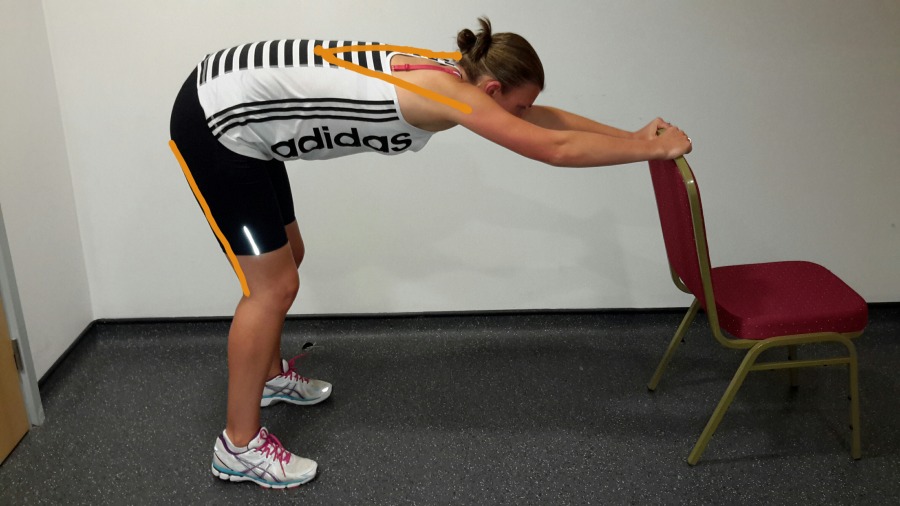
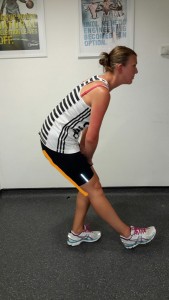
Standing, Shoulder, Back and Hamstring Stretch
In this stretch Claire has her knees bent, if you want to feel the stretch in the hamstrings at the same time, straighten the legs.
-

- Standing Shoulders Back and Hamstring Stretch
Stretches - 2
Don’t forget the yellow mark on each stretch is where you want to feel it.
Click on any of the photos for a larger view.
-

- Lower Back and Upper Back Stretch

-

- Kneeling Back Stretch

-

- Lying Abdominal and Lower Back Stretch

-
- Lying Lower Back

-

- Lying Buttocks and Lower Back Stretch

-

- Lying Side Stretch

-

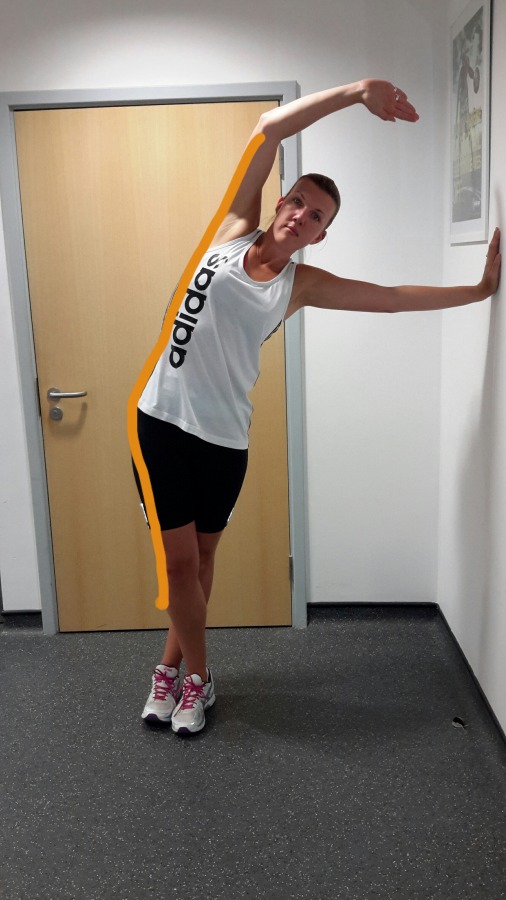
- Standing Outside Leg Waist and Back Stretch
-

- Kneeling Hip Flexor and Front Thigh Stretch

-
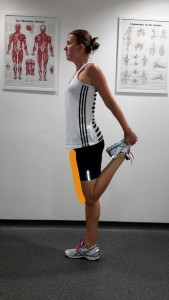
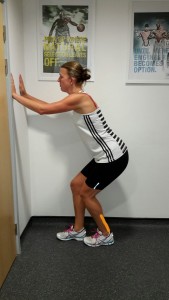
- Standing Front Thigh Stretch

-

- Seated Inner Thigh Stretch

-

- Lying Buttock Stretch

-
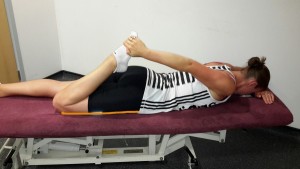
- Lying Front Thigh Stretch

-
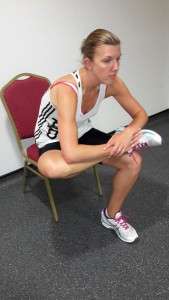
- Seated Buttock Strech

-

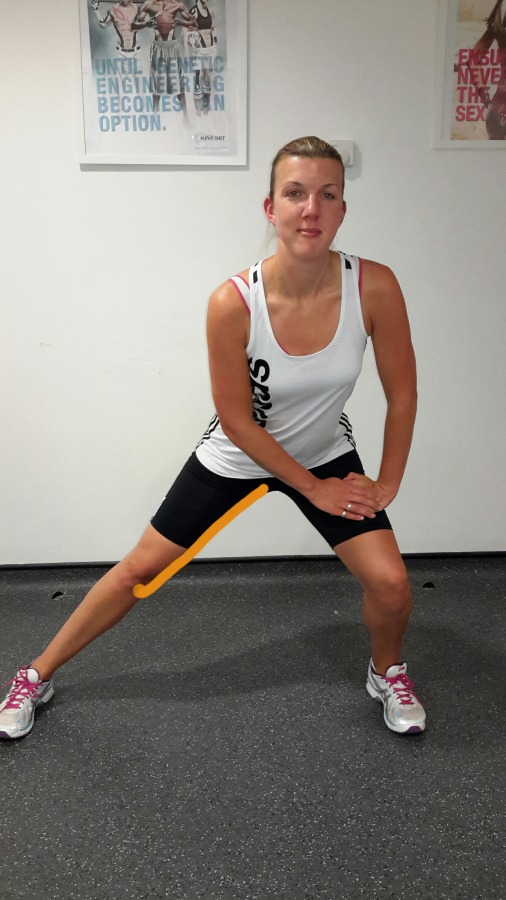
- Standing Inner Thigh Stretch
Stretches - 3
Don’t forget the yellow mark on each stretch is where you want to feel it.
Click on any of the photos for a larger view.
-
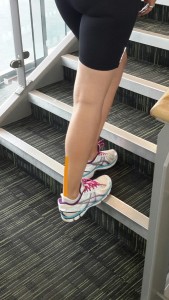
- Stair Calf Stretch

-
- Standing Deeper Calf Stretch

-

- Standing Calf Stretch

-

- Lying Calf Stretch

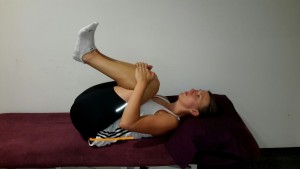
1st and 2nd stage of hamstring stretch
For this you can have the opposite leg bent, to help you stretch. If you find the stretch easy, go to step 2 and start to lower the bent leg until it straightens.
-
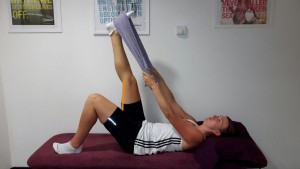
- 1st Stage Hamstring Stretch
-
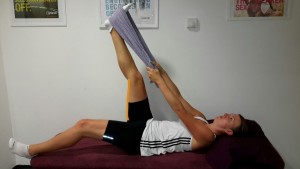
- 2nd Stage Hamstring Stretch
-
- Standing Hamstring Stretch